Thursday, December 31, 2009

Antique Markets.

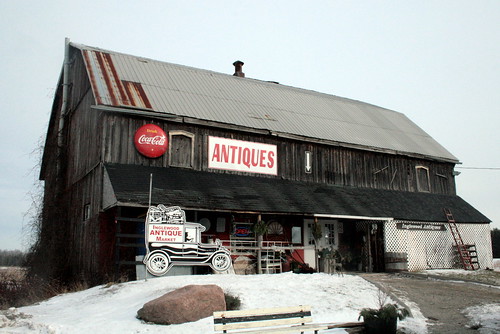
With the time off during the holidays, I have been able to take a couple trips to nearby Antique Markets. This is something I like to do with my mom since it gives us a chance to spend time together while seeing new and interesting things. I love shopping with her! She is like my goodluck charm as I always find things I had been hoping to come across when she's there.


We came across most of the antique markets by accident, we were actually only sure that two of them existed. This time everything was new (to us) and it was wonderful to be able to search through all the treasures. We decided to take home some of our very favourite things (which was helped by the 10% off after Christmas sale at one of the markets).

The markets themselves are interesting to see too. They're all so different. My favourites are the ones that go through room after room after room, where you can get lost in everything there is to look at.


I am so grateful to have been able to visit these places, find new treasures, and spend time with my mom. It was nice to have the time to do this. Next week it's back to work and school!

Sunday, December 20, 2009

Quiet.

The mad rush of last week is over. The end of the semester is always a busy time. Exams, two vet visits, a broken furnace, a sprained ankle, semi-last minute shopping, last minute sewing, and lots of running around, all in a period of a few days. At times like that it can be hard to remember to be grateful, but I am glad for the little reminders I received. Now I am grateful to have a little break. I have time to breathe. Things are quiet and sweet, and I am appreciating it all. I have finished setting up the holiday displays and am now taking it all in. It is calm and it is nice. I look forward to spending the coming week with family and friends, and sharing our traditions with each other. I hope to share some of them with you too.

Thursday, December 17, 2009

Locker Organizer.

Last year I sewed up a few tote bags as holiday gifts. One went to someone who had given many handmade gifts to others. When she saw the little bag, she was almost moved to tears. Not because it was any great present, but because even though she had made gifts for others, nobody had ever made a gift for her and she knew how special it was to think of someone while you carefully put together a gift for them.

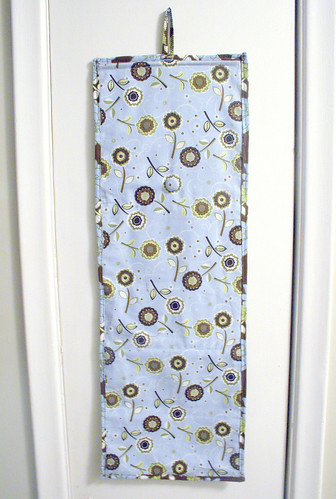
This year I knew I had to make her something again, but something a little more than a tote bag. She works in a school and stores her belongings in a locker during the day. A locker organizer was the perfect thing! Somewhere to store her little odds and ends and supplies, a place to keep a pen at your finger tips, and a larger pocket to keep hats and mitts (or notebooks).

I used two cotton fabrics in contrasting colours. I don't remember the designer or name, but I picked it up from my local fabric shop. I made up the pattern as I went along. Two long rectangles of fabric for the front and back, and assorted rectangles in the contrasting fabric for the pockets. Everything with a layer of interfacing (pockets & body pieces) to keep things sturdier. I did finish the edges on all the pieces of fabric before sewing them on to the background. It wasn't strictly necessary, but I found it much easier not having to worry about keeping all the edges even while sewing everything together.

The picture frame is just a square of fabric with a smaller square cut out in the center (inner edges folded under by making a snip in each corner). I sewed a thin piece of clear plastic to the back to protect the photo. The top edge is not sewn down, so the photo can be changed. The pocket to the right has a few lines of lengthwise stitching to hold pens in place.

I sewed a pocket for and inserted a small dowel along the top to prevent the corners from sagging when the pockets are full. In hindsight, I probably should have done the same along the bottom since it does sag a bit there.

The binding came next, and was a pain! I had never made my own binding or worked with binding before (I had started it on an unfinished project, but that remains unfinished). The binding and stitching around it are uneven in places, but I guess I can't expect to be perfect on the first try!

Last came the little details - the matching fabric covered button, and the fabric loop to hang it all from. The loop wraps around the button to keep it closed when you fold it up for carrying.

I had a lot of fun making this project, and definitely learned a few new things. It's something that could really be played around with a lot...different sizes of pockets, layered pockets, velcro, zippers, hangers, magnets...there is just so much that could be changed. If anyone wants to give it a try and would like more detailed instructions, I would be happy to share.

All ready to go in one of the gift bags I sewed up from my Shinzi Katoh holiday fabric!

Sunday, December 13, 2009

Doily Snowflakes.

A simple, but pretty craft. I saw doilies made into a snowflake garland on another blog and had to try it out for myself, only I had nowhere to put up a garland. I decided to cover my windows instead. I enjoyed making these so much. All it took was a selection from my vintage doily collection, a solution of white craft glue and water, a paint brush, and a bit of string. If you don't have craft glue, starch (the kind you use to stiffen clothes for ironing) works just as well.

All you do is paint the solution of watered down glue over the doilies (make sure to get both sides and soak through), and leave them to dry for several hours. A tip - paint from the center of the doily to the edge to avoid bunching and stretching. Once dry, tie a piece of string around one of the outer loops and hang up as you please! If you want the doilies to lay perfectly flat, you could place them underneath a towel and iron. So simple.

Placing them in a window where Christmas lights from the street are visible would create an even better effect. So wintery, and so pretty. The best part - even if the glue solution wont fully wash out, they're still usable on a table or flat surface while they're not functioning as winter decorations.

Thursday, December 10, 2009

Children in the Forest.

Last week I had the chance to take to the forest with a group of grade one students. We visited an outdoor education centre, where guides use the forest itself to provide opportunities for learning. It was wonderful to see the children out of the classroom and completely surrounded by nature, something these city kids don't get much chance to do. They looked, touched, listened, smelled, and even tasted what was around them. They tried new things, discovered new things, and gained so much out of the experience. So many channels for communication were opened.

My favourite points of our nature walk - watching the squirrels preparing for winter, talking about why alligators don't live in Toronto rivers (and having one of the children explain the difference between warm and cold blooded animals), listening to the rushing river water and racing sticks by the bridge, and feeling the wet leaves squish under our feet.

For lunch we had a cookout over a fire. Not the healthiest food, but a brand new experience for all of these children. Again, all their senses were at play. Seeing the flames, feeling the heat, hearing the crackling, smelling the burning wood and smoke (and having it sting our eyes when the wind blew it in our direction), and tasting the food we had cooked. Some children even conquered their fears as they were apprehensive about being near the fire, but decided to give it a try anyway. A chance to try something new!

And a lesson in trial an error - cooking marshmallows in the flames burns them, cooking them over the coals turns them nice, toasty brown.

Once the fire was extinguished and the coals cooled down, we had a chance to try drawing with the charcoal. We talked about how charcoals for art are made, and made a plan to try them out in the classroom.

After lunch we talked about preserving the forests and what we can do to help. As it is an outdoor education centre, there are lots of people walking along the forest floor. To give back a little, we sowed woodchips on the high traffic areas. This helps avoid the wearing down of the path, and protects the animals and insects under the forest floor. The children were excited to help out, and had a chance to do some "hard work" outside by shoveling, carrying, and sowing the woodchips. They were rewarded with hot chocolate and a nature story, but I think best of all they felt as though they had given back to the forest that had given them so much that day.

These children gained more from visiting a forest than they ever could from filling out worksheets. I had a wonderful time too!
Tuesday, December 8, 2009

Christmas Elf.

I've always admired Hillary Lang at Wee Wonderfuls' dolls. She does some really amazing work! I was very excited when this pattern became available, and put it in my shopping cart right away. I got to it asap and finished my doll earlier today. This was my first time both making a doll and embroidering a face, so I did have some trouble (the first eye took several attemps...serves me right for embroidering one instead of using a felt eye like the pattern calls for). I am proud of her though!

I made some small changes, like adding some braids and pom pom trim on the skirt, using ric-rac instead of felt around her wrists and neck, and the style of the face (it's more similar to the Wee Wonderfuls Olive and Archie dolls I think). I should probably sew her hat down too!

The pattern called for fabric and accessories I already had in my stash. Wool felt for her head, hands, and shoes; cotton prints for her legs, hat, body and skirt (my new Shinzi Katoh little red Christmas fabric!); linen tape around her hat, and of course the ric-rac and pom pom trim. And bells, have to have the bells!


The pattern wasn't difficult to make. Pinning and sewing around some of the curves might be tricky for new sewers, but the instructions are very clear and easy to follow. I'm going to have to try making another one.

Oh, and that's just the "mini tree". The real tree didn't have room for all of our ornaments this year. Oops!

Wednesday, December 2, 2009

Pssst.

It has been a while! A very long while. I am still here, and looking forward to get back into regular posting. It has been a very busy fall, but now things are winding down. My sewing machine broke for good in early September and I wasn't able to replace it until last week. I am so glad to be sewing on a machine again! Just in time to make some handmade holiday gifts. As always I am very much looking forward to the holidays. This weekend will be full of decorating, hot chocolate, secret sewing, and the last of the holiday bazaars. It is just the beginning!


Do you have anything special planned?

Tuesday, August 25, 2009

The Curtain.

A while ago we re-did this room (you can see the transformation here). The window was left bare though. I knew I wanted to make some sort of curtain for it, but I had trouble finding a fabric I liked. I don't like buying online for this kind of thing. Even if the scale of the print is shown, I have a hard time imagining it in person. My local fabric shop didn't have anything either. Everything was either too busy, too plain, or just the wrong colour. Feeling hopeless, I went to ready made curtains, but couldn't find anything there either. It seems again that everything is either too plain or too busy. We have this same issue with rugs. Finally, I went to a designer fabric depot where I immediately fell inlove with about 15 different $95 per yard fabrics (why is it that only designer stores seem to have this middle ground?). That definitely wasn't going to happen, so I took myself over to their clearance section where they have designer fabric on bolts, ready to go, for about $15 per yard. Not too bad. I found the perfect fabric and it was just big enough for the window, with a little left over (I'm thinking a bag).

Although I brought this fabric home over a month ago, July was a busy month full of summer classes, guests, and outtings, and the sewing part didn't get started until last week. I did have some issues with this fabric. The way the light shines through it is beautiful, but for some reason it really resisted being sewing in a straight line. It is also a little thick (it's inbetween a thick linen and an upholstery weight fabric) so the seams need to be ironed carefully for it to fall properly. Despite these issues, Friday was the magic day when the curtain went up and I think it looks great! I had considered making two panels, but the window was just two small for that. This curtain is just long enough that it can be tied to the side during the day and let back down at night. I love the way the pattern looks when the light shines through!

A perfect addition to this room!

Saturday, August 15, 2009

The Necklace.

I've always enjoyed beading and making jewellery, but I've never been very good at it. In my younger days I'd use pony beads and boondoggle. I remember making all kinds of hideous, sparkly, crooked creations for my mom and she'd show them off proudly. My poor mom! Later I moved on to seed beads and embroidery floss(hello, friendship bracelets!). More recently I have made necklaces using antique keys and simple charms, but I wanted to try something more complicated. I have always wanted to work with chains and fancy beads, but I have trouble keeping the metal bits straight. I always squish and pull too much, and the circles don't resemble anything of the sort when I'm finished with them!

I decided it was time to work past all of that and create an interesting necklace using something that would work for me. It was very simple to make, but still something I could feel good about. I'm sure I saw this idea on a blog somewhere, so I can't take credit for it. I wasn't able to find the post, so I can't give proper credit.

For this necklace I used little rings that are found in the drapery section of any craft store (I believe they are normally used for roman blinds), and wrapped them in embroidery floss. I separated the strands into groups of threes so it wasn't too thick. The covered rings were simply sewn together, and the chains and appropriate findings were easily attached.

I had no idea of how exactly I wanted this to look when I was finished. I picked a few colours, wrapped, and attached, and stopped when I was happy with it. It falls nicely when worn too! I will have to be more careful next time as it looks a bit messy where the rings are attached. I was hoping that wouldn't show.

I had a lot of fun with this project and am glad that I have this new necklace to wear.

Saturday, August 8, 2009

Pom Poms.

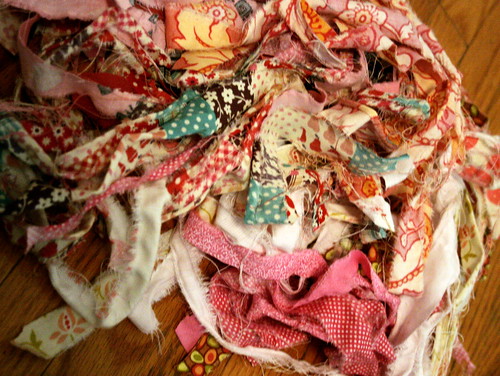
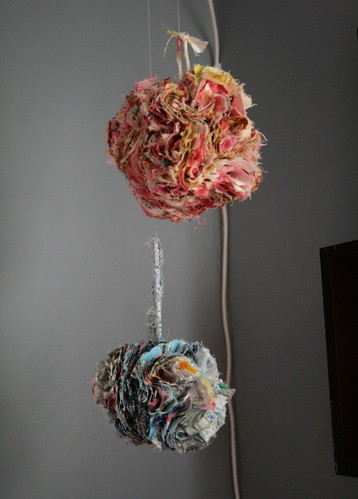
I hate throwing out fabric. I keep even the tiniest scraps, knowing one day I will come across some amazing craft project involving tiny little scraps and I will be so happy I kept them. When I saw this project on Molly Chicken I was glad I saved all those strips of fabric left over from straightening and shortening all those sewing projects. Mine don't look nearly as nice as hers do (I made the cardboard rings too thin and used way too much fabric), but I like them.

Really a lot of scraps. I liked how she sorted hers into pinks/reds and blues so I did the same.

This is a wonderful way to keep your hands busy when you want something that you don't have to think about. Just wrap and wrap and wrap until there's no more room.

Then you cut and tie and hang, and you're done! Perfect! I'm going to make tiny red and green ones to hang on my Christmas tree this year. Yes, I'm already thinking about Christmas.


This was a nostalgic sort of craft for me. It reminded me of making yarn pom poms at Brownie camp each summer. It became the popular thing to do at camp during free craft time, and girls from each session would teach those in the next. We all had chains of pom poms hanging from our camp hats.

I don't know how I didn't find that big bunch of pom poms annoying. Seriously, look how many are on there!

Double points to this project. Using up huge amounts of scraps to make something cute and nostalgia all in one!

Friday, August 7, 2009

Cottaging.

It has been a busy few weeks full of summer adventures, good friends, travel, gardening, crafting, and relaxing. We had friends from Germany staying with us for three weeks, and my blog was easily neglected. I have some craft projects to share, but this post is dedicated to one of my very favourite summer activities..cottaging. I don't have a cottage, but my uncle is kind enough to let us visit his every so often. It's on a small lake in Muskoka, and it is wonderful. One of my very favourite places.

It is quiet, fresh, and the scenery is incredible. I love sitting out on the dock and watching the boats pass by.

And every so often this boat comes by too, full of passengers waving to those out on their docks.

There are wonderful antique stores and even a vintage fabric shop for me to rummage through. This one is just too sweet.

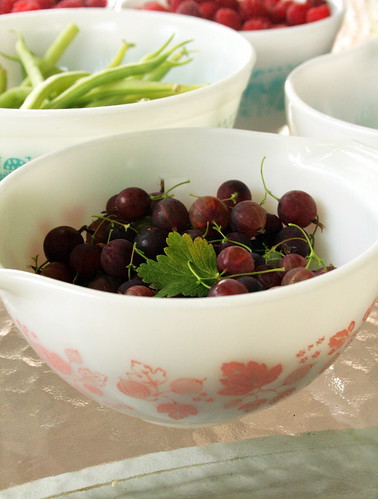
Here I completed my Pink Gooseberry Cinderella bowl set. I had been looking for these bowls for a very long time.

This was Lola's first visit to the cottage. She loved exploring the land and swimming in the lake.


Being out on the water was so relaxing. I kayaked to the bigger lake and enjoyed the time spent alone. It allowed me to clear my head.

And others enjoyed the time spent together.
And after a long day we felt calm, refreshed, and at peace. Not quite ready to return to the business of the city, and anxious for our next trip up north.

Saturday, July 18, 2009

Gifts from the Garden

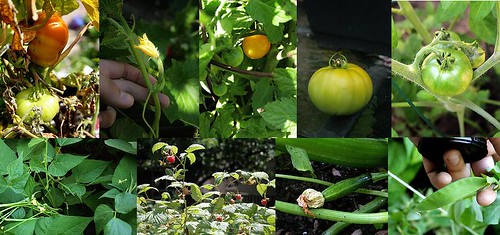
July is a wonderful time for the Garden. Things are growing, we are harvesting, and we are quite literally enjoying the fruits of our Spring labour. Some of it is being eaten straight from the plants, some is being cooked up into recipes, and some is going into the freezer to be stored (I haven't yet tried canning). It is very exciting to find new things ready to eat each day.

We have been snacking on berries. The raspberries grow faster than we can pick them. We have neighbours over nearly every day to help in the harvesting. It is nice to share this with them, and in turn one our closest neighbours share their pool with us.

The herbs are being dried, or cooked fresh into our food. They smell and taste wonderful. So fresh!

The gooseberries match my favourite bowl. We have two bushes and not enough people to eat them all!

We don't have a lot of land, but we have a lot growing. Not enough to sustain us, but enough to enjoy. I can't wait to see what is ready tomorrow!

Tuesday, July 7, 2009

Spare Room Makeover.

The before..

What you can't see are the Toronto Blue Jays and Toronto Maple Leafs borders around the ceiling. I'm so embarassed to show this photo because of the mess and the incredible amount of stuff in the room. The room's previous owner left pretty much everything behind, and my piles of fabric went on top of all of that.

After everything was cleaned out, the borders were removed, and the carpets around the edge of the room were ripped up.

The room was painted in a very light blue, Pensive Sky by Behr, and the rest of the carpet and the underpad was removed. I had a fun time pulling staples out of the floor! Whoever installed the carpet went a little crazy with the staples. The old mattress was also traded with a more comfortable one.

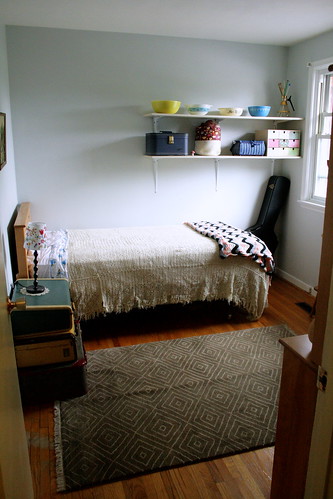
And the after..

There is still a lot I want to do with the room, but this is the 'final product' for now. The rug was found in the clearance room of a high end furniture shop. It was less than a quarter of the original price. The shelves on the wall were already there and are so useful that I didn't want to remove them. The upper shelf holds some of my Pyrex collection, and the lower shelf holds storage for craft supplies.

The picture on the wall is from my grandmother. The suitcases are from two of my neighbours, and are being used for both fabric storage and as a bedside table. The bed is part of my brother's old bedroom set. I'm not really fond of the set, but it's solid wood and really good quality. It's perfect for a child's room, which is what it is being saved for. I'm toying with the idea of making a cover for the headboard, but I think the warmth of the wood adds a bit of brightness in this corner. The lamp is from Ikea, and the blanket was made by my mom.

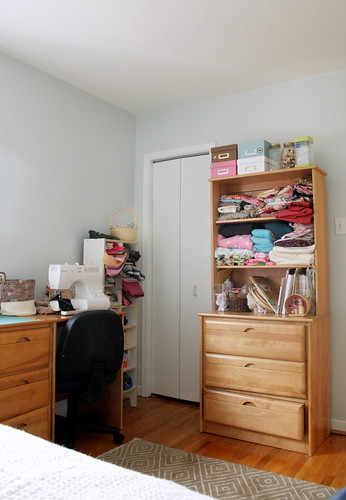
The sewing corner sits on the opposite side of the room. Here you can see the rest of the bedroom set, which holds my craft books, fabric, and supplies. The white shelf was bought at a church sale for $5. I'm planning to make a covered cork board to go over the desk. Right now that wall is a bit bare.

Curtains are in the works for that window. The blind broke while we were trying to put it back up after painting, so the window is in desperate need of a covering. It was a lot of work to turn this room around, but I'm so happy with the result!

The books, card games, and stuff from the first photo is either in storage in a huge closet in the basement, or is back with its original owner. The most important thing was making the room functional. We have guests coming to visit this summer and we need the extra sleeping space. It is also very nice to be able to sew and create in an uncluttered space, and have more room for my supplies. There is a lot more closet space for storage. It's just more functional all around.