Sunday, June 30, 2013

Sewing for Baby - Wetbags


We're planning to cloth diaper Birdie. Although it's supposed to save a lot of money in the long run, there are those stash building costs, and you need few things along with the actual diapers and wipes. I had been browsing around for wetbags (waterproof zippered bags to store dirty diapers in when out of the house). Most I found were $15 a piece, my favourites being above $20 with no shipping to Canada (of course), which I was hesitant to spend. Don't get me wrong, I am willing to pay more for good craftsmanship (especially on Etsy, there's a lot of great really well made baby stuff on there), but with all we had to get, every bit adds up.

I had a lot of cute prints in my fabric stash and even some waterproof PUL left over from when I decided I would make my own cloth diaper covers (HAH!), so why not make them myself? I did have all these grand plans of handmades for this baby after all. Most of that went out the window when my first trimester wasn't exactly as smooth as I had thought it would be. Growing babies isn't always glamorous. At least these would add a couple more handmades to our ever growing pile of baby items.

These were so easy to make that you really don't need a tutorial to figure them out, but I'm going to post one anyway, just for fun. If you don't already have the supplies on hand I imagine making your own won't really save you money, but custom items are always fun! There are probably several ways to make these, this is just what worked for me..


Along with your sewing machine, iron, thread, scissors, etc, you will need:
-two main pieces in your chosen fabric (I just used a regular cotton fabric for the outside). The first bag I made came out a little bigger than I wanted it to, so I chose to make this one 13 x 9 inches, which would come out closer to 12 x 8 when finished.
-two lining pieces in waterproof PUL fabric (these will be the same size as your main pieces)
-a zipper long enough for your bag (at least two inches shorter than your top side, or longer..don't worry about it being too long, you can always trim it after sewing)
-two small pieces of your main fabric (these will be going on the ends of your zipper), I used pieces that were 3 x 3 inches just so I had more to work with, but you really only need 2 x 2.
-if you want a hanging loop you will need a strip of fabric in your main colour. Mine measured 3 x 8 inches

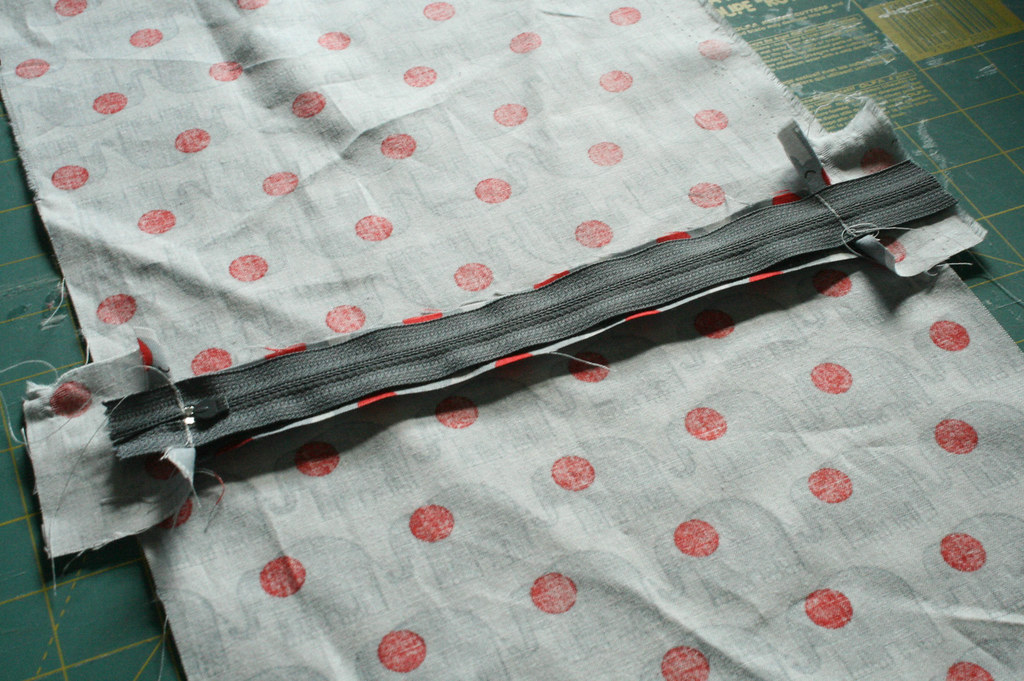
Once your pieces are all prepared, grab your zipper and your two small pieces of your main fabric


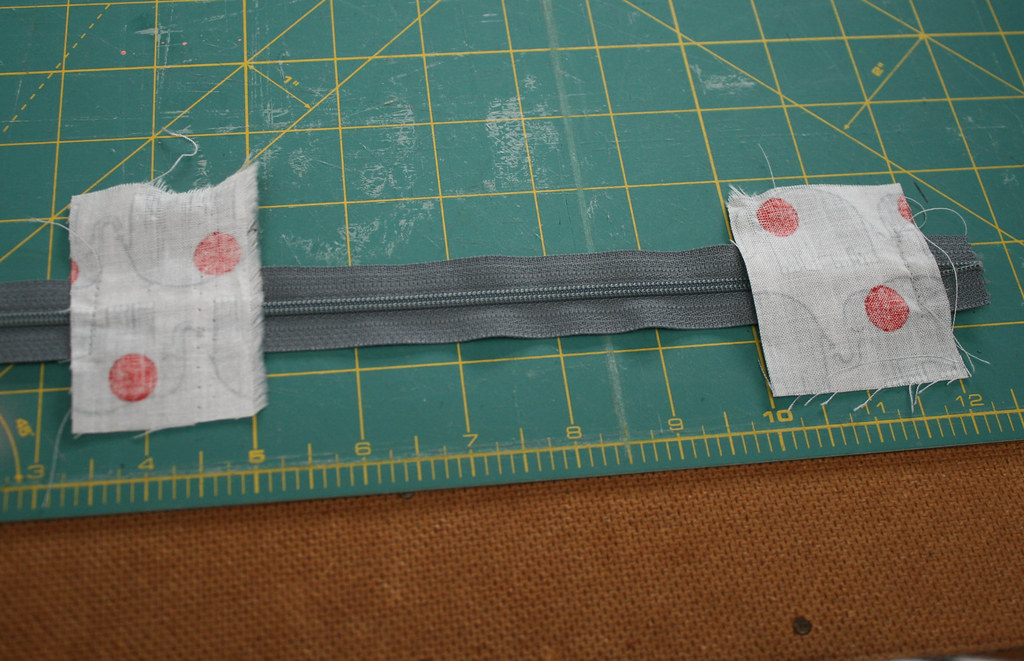
Line up the small pieces of fabric wrong side up on either end of the zipper. You're going to sew on the outer edge. Make sure that when you line up your zipper with your main fabric there is at least an inch of the small fabric pieces showing on either side.


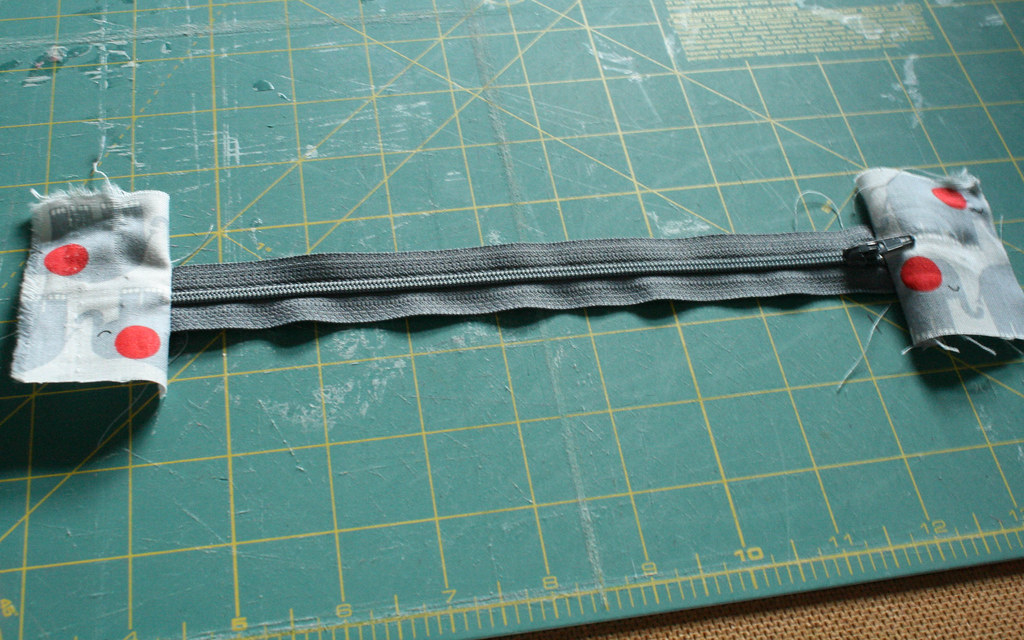
Flip your fabric pieces over.

If you are including a hanging loop, put your zipper aside for now. If not, skip this next part.


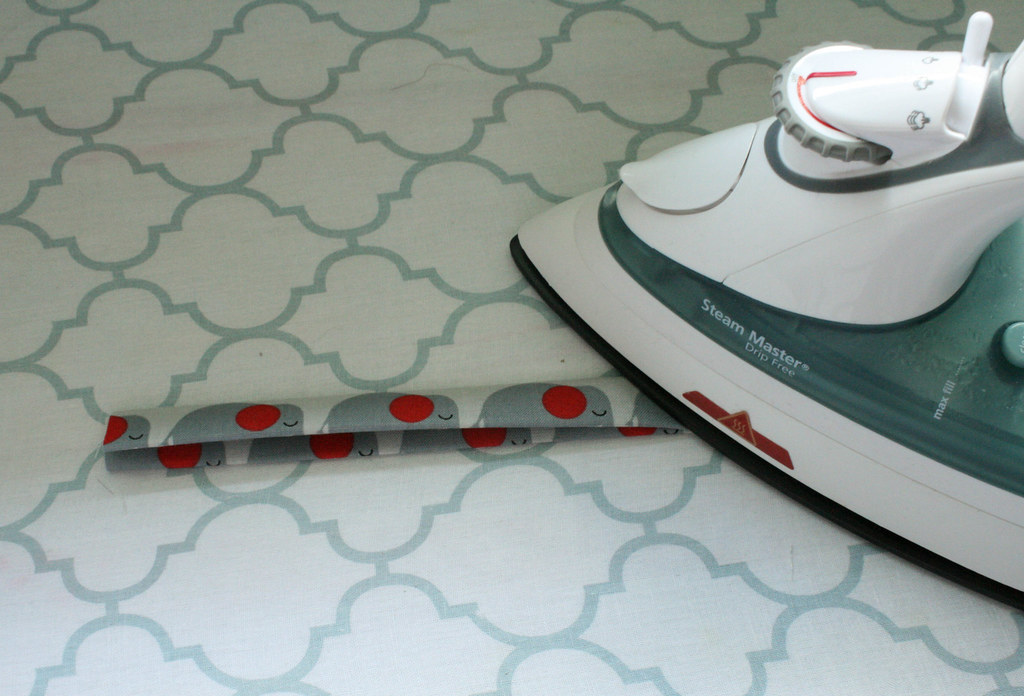
Using your iron to press after each fold, fold your hanging loop fabric piece in half. Open back up and fold each side to the middle. Fold this in half so only finished edges are showing. You do not need to finish the ends because they will not be showing.

While you are ironing, folding over the top edges of your two main fabric pieces is a good idea. I did not do this with the PUL fabric because I was worried it would melt.


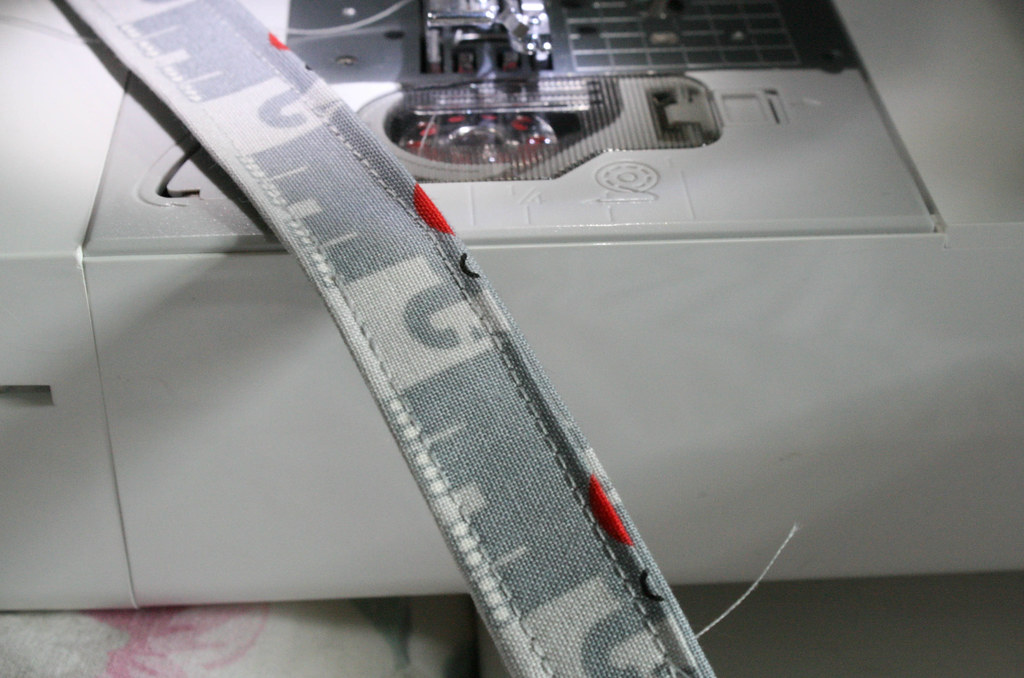
Sew two seams down your loop piece to hold it together.
Tip: using thread that matches as closely as possible to your fabric will always make a project look more finished and professional. If you are sewing two pieces of fabric together with one seam, use different colour thread for the bobbin and needle.


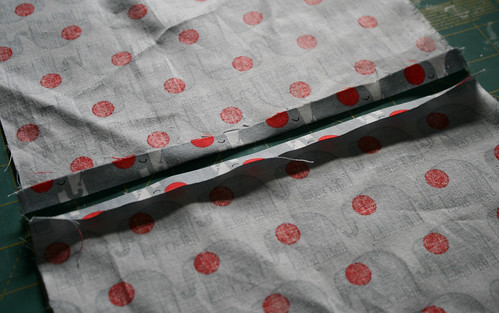
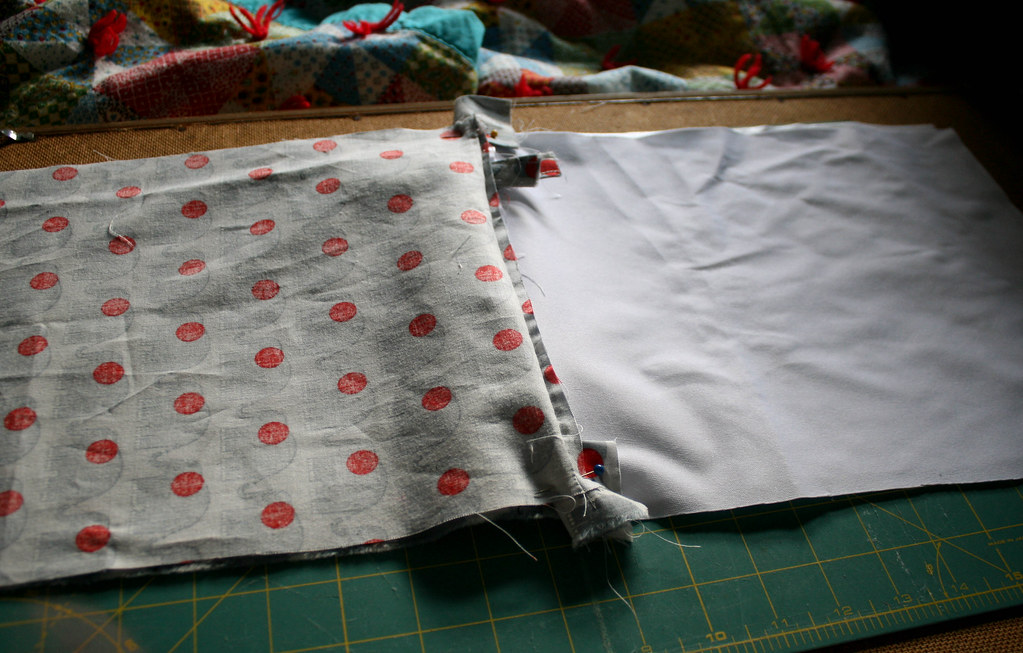
Lay out your two main pieces, tops facing each other, wrong side up. Make sure that you leave a small space between the pieces where your zipper will sit (you still want most of the zipper fabric to overlap your main fabric). Make sure you have your pattern pieces facing the right way so you don't end up with one side upside down.


Fold over the top edge of your PUL fabric and place it over one side of the zipper so you are sandwiching the zipper fabric between your main fabric piece and your PUL fabric. The PUL should be right side up (one side will be shiny and smooth and the other a little fuzzy and matte - the shiny side is the right side). Pin your 'sandwich' together, making sure the zipper fabric is caught between your main fabric and PUL, and that the zipper itself is not covered by either fabric. Do the same thing on the other side.


At this point your should have the right sides of your main fabric and your PUL fabric facing out, with your zipper sandwiched between.


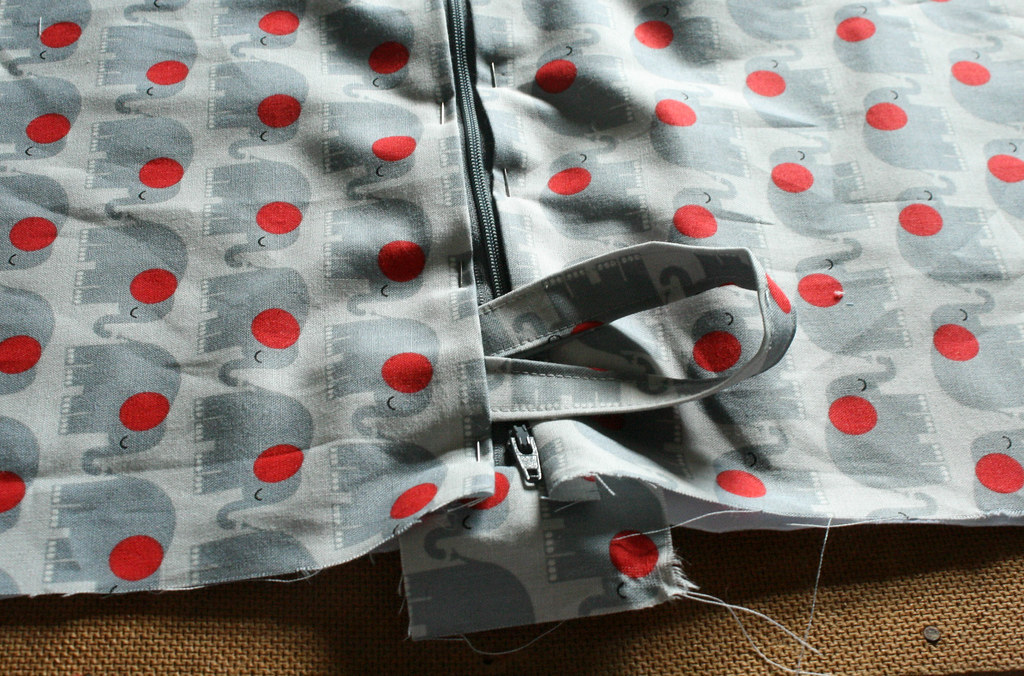
If adding a hanging loop, slide it in between your main and PUL fabric. When sewing make sure you do not sew the loop part into your seams, just the ends.

Sew both 'sandwiches' together on eiter side of the zipper (if you have issues with the zipper pull getting in the way of your machine's foot, open the zipper to move it out of the way). Make sure you choose a tight enough stitch length or else liquids will be able to get through. If you need to rip out any seams please be gentle. PUL fabric can tear and any holes will mean leaks.


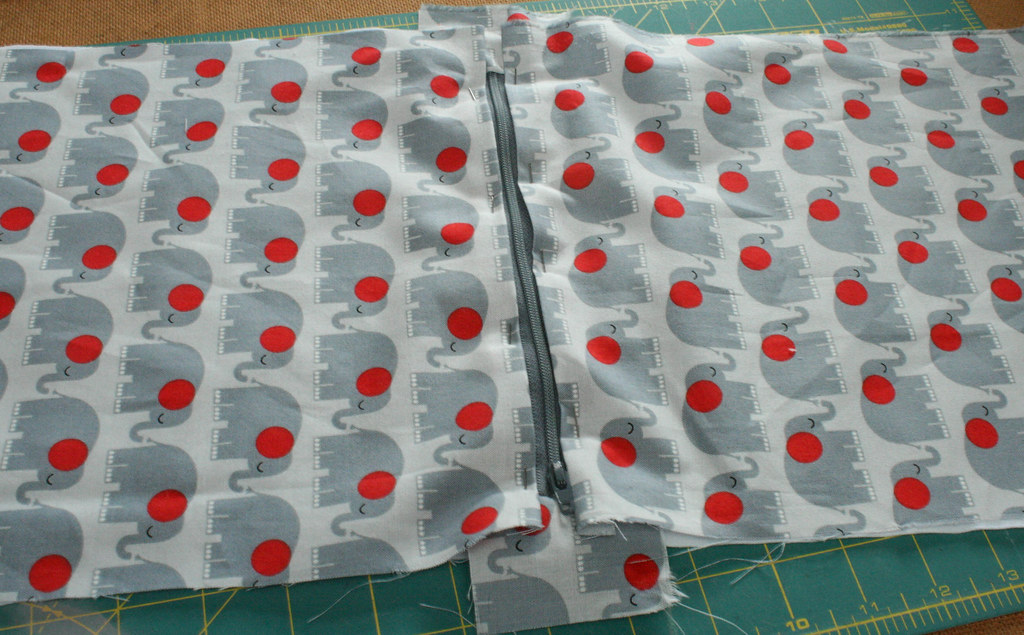
Once your seams are done, flip the main fabric pieces so they are right sides together, and the PUL pieces so they are also right sides together. Both PUL pieces will be on one side of the zipper and the main fabric pieces on the other. Your small pieces of fabric at each end of the zipper will be folded over so everything lays flat.

Making sure the zipper is open, pin in place and then sew all the way around your main fabric and PUL fabric, leaving a gap of a few inches open on your PUL fabric so you can turn your work. The zipper needs to be left open so the main fabric can be pulled right side out through the hole in the PUL fabric.


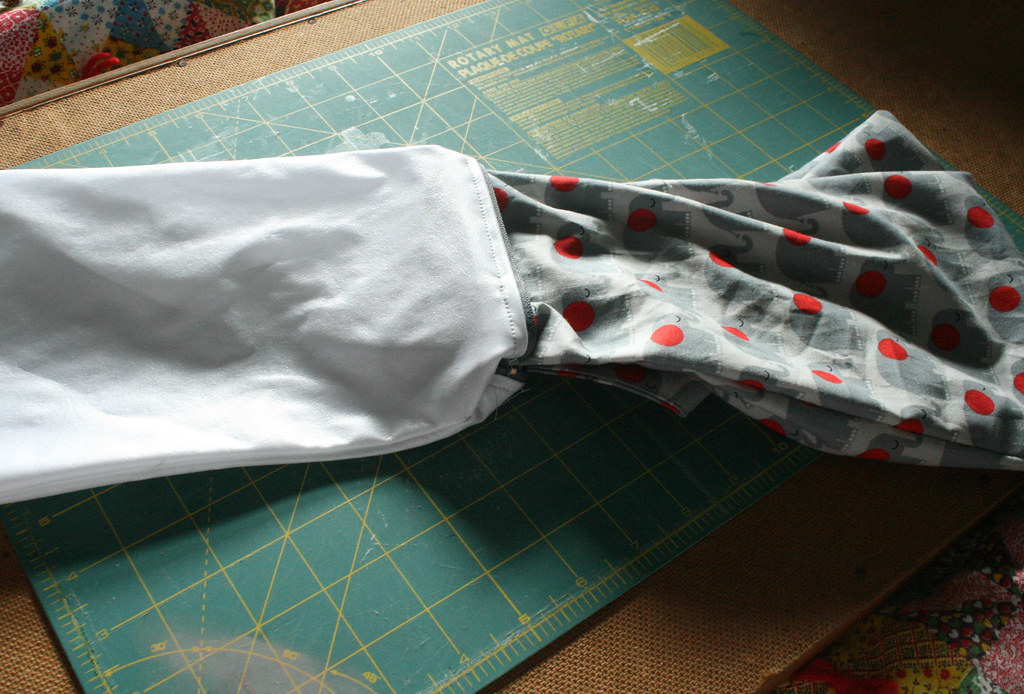
After ironing your seams (main fabric only, NOT the PUL) and snipping your corners, pull your work through the gap you left in your PUL fabric. Close the gap using either a blind stitch (make sure to use tight stitches) or a sewing machine stitch you don't mind showing. Tuck your PUL fabric into your main fabric. The PUL fabric will keep any messes inside the bag.

Now you're ready to use your new wetbag! When it's dirty, just throw it in the wash long with your cloth diapers. Turning it inside out, or bringing the PUL lining to the outside for washing will make sure it gets cleaned well.


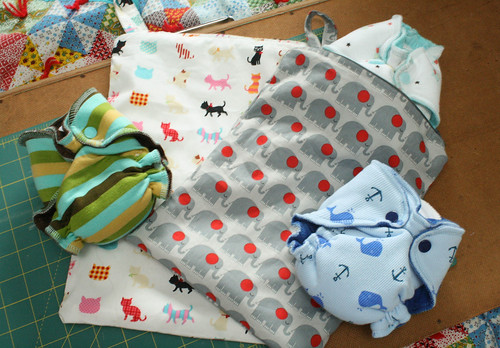
It would be easy to customize these bags by adding pockets, moving the zipper, using a box bottom for the bag, using more than one fabric, or adding embellishments. You can change the loop to feature a snap so you can hang it around a stroller or bag handle.

Sunday, June 23, 2013

Year One

cake topper from the small object.
 
Jer and I recently celebrated our one year wedding anniversary. Our wedding was such a special day for us, and so much fun to remember (you can see some of the photos..guests and official..on my flickr page). We usually don't go all out with celebrations (well, aside from the year he surprised me with a trip for our dating anniversary!), but we did spend the day together and visited the forest we got married in.
 
We decided not to spend much on gifts for each other, so I decided to get creative..well, at least a little creative. I'm a sucker for traditions, and since the traditional gift for a first anniversary is paper I wanted to do something involving that. I was stumped until a friend posted a quote on facebook from the same book our wedding reading was from. I handwrote our reading out on a piece of plain scrapbooking paper, put my favourite photo of the two of us from our wedding over top of it, and added a couple doodles of the characters my friend created for us for our wedding. I also got him a giftcard for a book. A book is paper, right? Ok, so not very original of me, but he enjoyed it anyway.


After our not so long because this baby belly is getting a little uncomfy walk through the forest we had a quiet dinner at home, looked through the photo guest book from our wedding (and I finally added the photo of my uncle that he returned to me after accidentally pocketing it and forgetting about it...can't have a photo book without him!), and watched a few episodes of Lost, which we've started re-watching.


This first year together as a married couple has been a big one. We've been through a lot, especially during these last several months, but have only grown as a couple from it. In two short months we will be adding to our little family with the arrival of our little baby bird, and I could not be happier. I am so grateful for the life we have together.

Friday, June 21, 2013

Weekly Favourites..

Ok, it is a little funny calling it weekly favourites since it has been so long since I've posted one of these, but the name is staying and maybe this time I will be better about posting. We'll see!

1. adorable red and white checkered vintage sweater. Too bad it doesn't come in my size!


2. beautiful jadite grease jar and salt & pepper shakers.


3.catherineholm aqua and white striped enamel bowl. I have had a serious thing for aqua lately.


4. pallet bookshelves. I have seen these over and over and I love them just as much every time. Hung low on the wall, they'd be perfect for Birdie's books.


5. retro style aqua fridge? My appliance man husband would never go for it.


6. herringbone hamper for the baby bird's dirty clothes - much more fun and decorative than a regular laundry basket, but also much more expensive.


7. lovely hanging glass terrariums.


8. colourful reuseable berry containers, perfect for the upcoming berry season.


9. pretty much everything about this room. So dreamy!


10. this awesome vintage train case turned charging station tutorial. I want to make one of these!


Sources: 1. Nosilla Vintage; 2. KOLORIZE; 3. Retro Aesthetic; 4. welke; 5. past present and beyond; 6. land of nod; 7. smile & wave; 8. pinterest; 9. skjerstad; 10. design sponge

Wednesday, June 19, 2013

A Garden Update


This year I had planned to stick with what was already growing in the garden. We are facing two serious family illnesses and one more minor one, an upcoming move, and a baby on the way. The last thing I needed was to add more nurturing and care to that list. But, oh, how those beautiful garden posts sucked me in. Everyone seeding, planting, and growing things. I had to dig my hands into the soil. I tried to keep it simple with just a few colourful flowers and some veggies that may be too late to do much at all.


It turns out that all that nurturing and watching things grow is pretty relaxing and wonderful, and this garden is a nice place to take a break in. I need to remind myself of this. A couple plants are truly not that much work and really do make a difference.


Of course there are all the old favourites growing too.


The doves that nest in our grape vines have also returned, although Lola spotted a squirrel up there yesterday so it may have eaten the eggs. Lots of other little birds have been by too.


There will be lots more garden days this summer, and maybe even some fresh veggies to enjoy.

Monday, June 17, 2013

Finishing the Blue Tulip Tree


I love the feeling of finishing a project, and this was a long time coming. It took me 5 years to find the pattern (after seeing and falling in love with it on a friend's flickr stream), and nearly another to finish it. It was a big project and I worked on it in spurts here and there, like I do with most of my projects. I often have several on the go for this very reason.


A couple months back I was almost to the end when I ran out of yarn in several of the colours. I momentarily panicked, thinking this is a vintage crewel kit, and while there used to be the option to order extra yarn from the company - with an order form all ready in the kit paperwork, there's no way I'd be able to get that same yarn now. I scoured etsy and ebay trying to find a match, but it would mostly be guessing and hoping that the colours were right after all. I eventually took to searching craft supply stores. Through this search I came across a company called Appleton that offeres crewel yarn in about 250 different shades. This site has a colour cards you can order to compare colours (a little pricey at $35, but it saved me from spending even more than that ordering colours I thought would match). The yarn is available on many craft supply stores.


It was easy to compare colours and I got a fairly accurate match for every colour except for the lightest green. This meant that I subbed in the medium green in a couple places.


So worth the trouble of ordering the colour chart.

An issue I did run into was the colour charts are for both the tapestry yarn and the crewel yarn. The chart yarn was the right thickness and I had assumed it was the crewel yarn since the yarn that came with my crewel kit was the same. It turns out the crewel yarn is much thinner than the tapestry yarn, and tapestry is what I needed. It didn't end up being very noticeable, so it wasn't a big deal, but lesson learned - always check the gauge.


After all of that, I finally had my yarn to finish up this piece, and it is done! I blocked it, framed it, and now just need to hang it up.

I had to block it in sections because I don't have a large enough blocking mat (the finished size of this is 24" x 36"). I am normally lazy with projects and don't block them, but I thought it would be fun to show the difference between the blocked and not yet blocked parts to show how necessary it was.


Even though I used a embroidery hoop it still puckered badly. Blocking fixed most of it. The frame is just a cheap poster frame I got for 35% off at a local craft shop. I didn't want a heavy frame or glass on it, and there were no other frames in this size. I'd been looking at thrift shops for a while, but nothing right showed up.


I'm so glad to have this finished up. Now there are just a few more works in progress to get through before our baby bird arrives!