There is a part 2 to this post, posted after the wedding with some further tips and insights. You can find that
here.
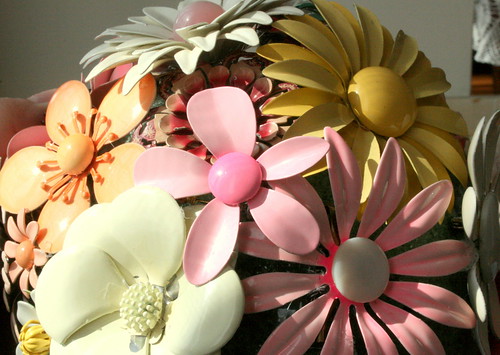
For our wedding I really wanted an enamel brooch bouqet. I have several vintage brooches from my grandmother and great grandmother and I just love them. I thought it would be fun and a little more special (to me) than a regular flower bouquet. I searched online for someone who could turn my brooches into a bouquet, but the prices were way out of my range. I completely understand why they're so high, it really is a lot of work, but I decided I would have to under take this project on my own.
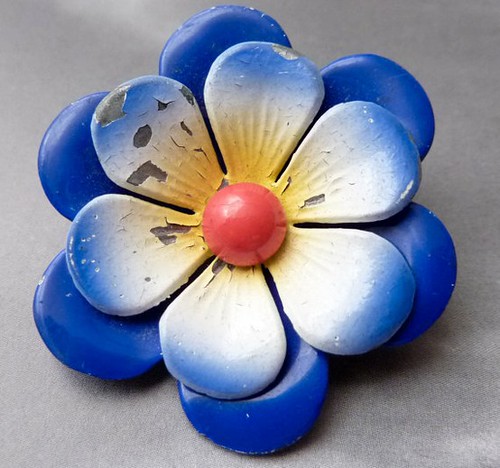
I didn't have nearly enough brooches, so I scoured thrift shops and antique malls, searched on ebay and also on Etsy. Giving yourself plenty of time (several months at least) will help yield better results. What I found is that thrift stores were definitely the cheapest, but the brooches were extremely hard to find. Thrift stores in smaller towns had more to offer than ones in cities. Earrings were easier to find at thrift stores and made great fillers around the bigger brooches. Etsy was next. With a little poking around you can find some wonderful brooches for great prices. This is where I got most of my bigger brooches. I set myself a price limit and only went over it on a few very special pieces. Etsy also has a price option so you can filter out results above your price range. Ebay was just way too expensive. Single brooches were going for $20-$30. There were bigger lots for a better price, but I found that I'd only really like one or two brooches from the lot, so it wasn't worth it. I did not order a single brooch from ebay. Antique malls were the worst. I came across several wonderful brooches, but they were all at least $40 a piece. It may just be the malls in my area, so please don't rule them out completely. I did find one plastic brooch at an antique mall for under $10, but the paint began to chip off right away.
I think the prices on these brooches have shot up a lot over the past couple of years because these bouquets are gaining a lot of popularity. That's okay though, it just takes a little more work to find what you're looking for!
I was asked by several people to share how I made my bouquet. This method may not work for everyone, and you may find it much easier to do another way, this is just how I did things.
What you will need:
-as many vintage enamel brooches as you can find (do remember that the end result will be HEAVY, so try not to use too many very thick brooches)
-a styrofoam craft ball in your preferred size (mine is 7 inches in diameter)
-a length of hollow PVC pipe (mine is 14 inches long, which is probably a little too long)
-floral wire
-hot glue gun
-pliers
-wire cutters
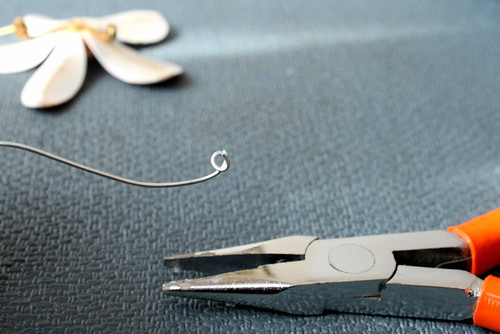
Cut a length of wire using your wire cutters. Remember that you can trim it later, so it's always better to cut more. Using your pliers, twist a loop in one end of your wire.
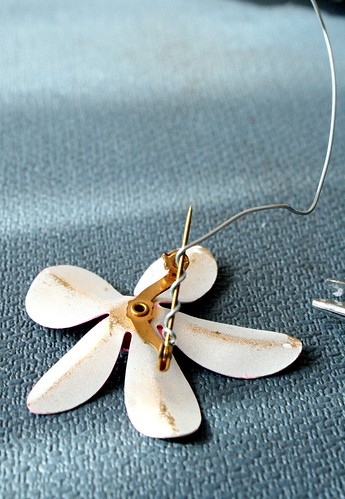
Slide the loop over the clasp of your brooch. Hold it in place with your pliers and wrap the wire down the length of the clasp. Remember that you need to leave enough room at the end to be able to close the clasp properly. Using the same wire I would go back and forth and then end up in the middle of the clasp.
Depending on the size and weight of the brooch I would repeat the previous step with up to four wires, wrapping each wire around the first one. This gives the brooch more stability. You don't want them flopping around. This is especially important if you do not want to use hot glue to help stabilize the brooches.
Find a spot for your brooch and push the wire into your styrofoam craft ball. Repeat with all your brooches until you're finished. It's easy to re-arrange the brooches so don't worry about not finding the perfect arrangement right away. Once you've found the perfect placement you may want to secure some of your brooches using hot glue. I found that some of mine moved around more than I wanted them to. How much empty space you leave at the bottom will depend on how much fabric you want to show.
Next comes making a handle for your bouquet.
EDIT: after finishing my bouquet, I really didn't like the way the full ball looked. I ended up taking off the fabric, pulling out the PVC pipe, and sawed off the bottom of the ball, leaving a flat area. I left about an inch of the ball below the flower line. I also sawed several inches off the PVC pipe as it was just way too long and looked funny. Unfortunately I didn't take any pictures of this part, so you'll have to use your imagination.
Push your PVC pipe into the bottom of your styrofoam ball, leaving an indent. I used a knife to help me cut down as far as I wanted my pipe to go, but you may be able to twist your pipe down far enough. I put hot glue on the end of my pipe and pushed it down into the styrofoam ball. I also put hot glue around the edges once it was inside. You're going to end up covering this with fabric, so it doesn't matter if it's messy.
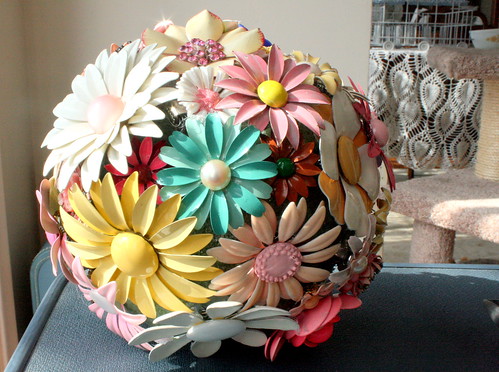
And there you have your brooch bouquet with your handle! Now you just need to add fabric to cover the rest of the ball (in retrospect, it would be much easier to add the fabric before the bottom brooches) and ribbon to cover the handle.
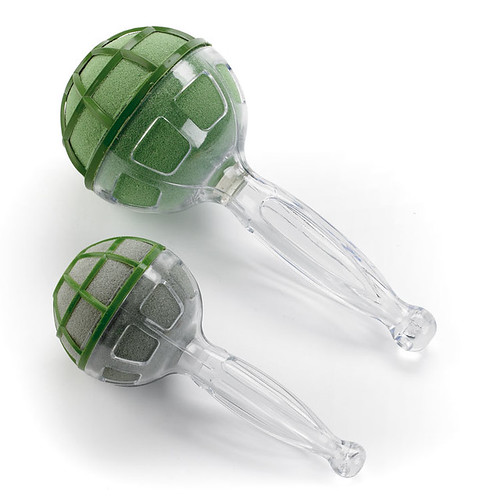
An easier way to make this would be to find a ready made bouquet holder, like this..
Of course I couldn't find one or a website that would ship one to me. The only issue I can forsee with the bouquet holder is that the inside is made of floral foam rather than styrofoam, so you'd have less opportunity to re-arrange your brooches before the floral foam was ruined.
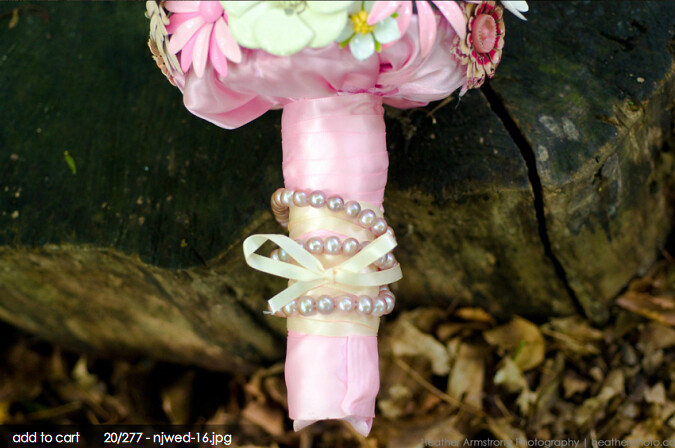
I really wish I had taken photos of attaching the fabric, but hopefully an explanation will suffice. I purchased a pink satin fabric from my local fabric shop and cut it to size (about 8 inches longer than the bottom of the foam ball, and overlapping around by several inches). I attached it by hot glueing one edge to the foam ball (several inches up from the edge) and just continuing to glue as I went around. I pleated the fabric every few inches to make it "bunchier", and overlapped it at the end (folding under the edge so it wasn't unfinished). I also folded over the top edge because I made the mistake of attaching my fabric AFTER putting in all the pins. It would be much easier and cleaner to attach the fabric first.
photo taken by Heather Armstrong of heatherphoto.ca
Once finished, I hot glued a small piece of ribbon over the bottom of the handle to cover it. I then gathered the fabric from the foam ball to the top of the handle and started wrapping my coordinating ribbon around it. It is best to play with your wrapping before using hot glue to secure it because it can take a few tries to get it right. Slowly wrap down your handle, adding a bead of hot glue every once in a while. If you have a specific way of holding your bouquet in mind you can make sure to have your seams at the 'back'.
Happy crafting!